If you’ve tried running acrylic on your current beam saw, you’ll already know it’s not like cutting board. On paper, it should be straightforward but in practice, it’s where things start to get frustrating.
You slow it down – it melts.
You speed it up – it chips.
You tweak the setup and you still end up with inconsistent edges and the foils melting together.
At a certain point, it stops being about technique and operational skill level and starts being the beam saw’s limits.
Why is it so challenging to cut acrylic on a standard beam saw?
Most beam saws are built around wood-based materials. They handle MDF, MFC and chipboard all day without breaking a sweat. But acrylic is far less forgiving.
What you start to see is heat building up faster than you can manage, edges that look fine one minute and start melting the next – even the appearance of small chips or burn marks that show up after the cut. What follows is manufacturing inconsistencies, even when you’re doing everything by the book (or machine manual in this case).
Sure, you can work around these factors to try and avoid varying results the best you can but this isn’t an efficient way to work. It takes time, it creates waste, and limits how confidently you can take on jobs that require acrylic to be cut.
These production limitations will hit you where it hurts – your bottom line and bottle necks will naturally appear. It’s at this point when most people realise this issue isn’t just how you’re cutting acrylic – it’s what you’re cutting it with.
Acrylic needs a level of control that standard beam saws just aren’t designed to give. It needs proper, consistent feed rate control (not just “slower or faster”) and the right blade setup and geometry for plastics. Plus, the heat needs to be manageable during the cut while keeping sheets properly supported to avoid movement or vibration.
Without that, you’re always adjusting, second-guessing, and hoping the next cut comes out clean.
What changes when you upgrade to an fk4?
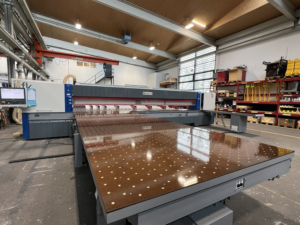
When you upgrade to a machine like the IMA Schelling fk4, the difference isn’t subtle – it’s noticeable straight away.
You’re not fighting the material anymore. You can actually dial in feed rates properly and keep heat under control. The right blade setup reduces chipping instead of just minimising it and offers a cleaner cut with less need for rework. Large acrylic sheets also stay stable, so you’re not chasing vibration issues.
And just as importantly – it’s repeatable. That’s the bit that really matters in production. When you’re able to cut acrylic consistently, you immediately stop wasting sheets and spend less time tweaking settings, allowing you to take on work you might’ve avoided before. Suddenly acrylic stops being a problem material and starts becoming a useful one.
If you’re currently making acrylic work on your existing beam saw, you’ve probably already pushed it to its limits. But if it still feels inconsistent, slow or a bit unpredictable – it’s not you. It’s the limit of your existing machine.
Once you remove that limit, everything gets a lot simpler.
Why not put the FK4 to the test?
View more videos of our fk4 cutting acrylic here.